Back to TheWorxHub for Senior Living Main Menu
Adding a Request
A work request is generally entered by a staff member or a resident and then approved and accepted as a work order by the responsible department. Once you are logged into your WorxHub account, you can submit a request to any department within your community that use TheWorxHub. This could include Maintenance, Housekeeping, IT Services, Room Booking, and Transportation.
Watch the Video Tutorial:

|

|
How to Submit a Maintenance, Housekeeping, or IT Services Request
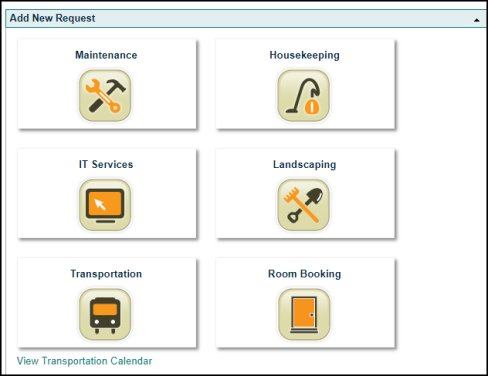
- From your Home tab, click on the Department that needs to receive the request you are submitting.
- Click on the location picker icon (
 ) to select the location of your request.
If you have access to the Space Management application, click the map pin icon (
 ) to select a location from a floor plan drawing. *Note: If you do not currently have this application, please contact your Sales Representative or Client Services for more information.
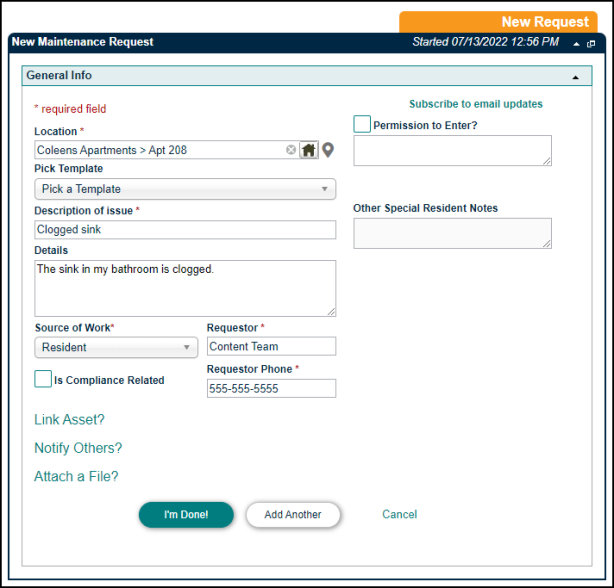
- Enter a Description of the work that needs to be performed. *Note: If this work is commonly requested, you can click Pick Template to select a requestor template that will auto-populate fields on the request form for you.
Watch the Video Tutorial:

- Type any additional details and notes in the Details box.
- Select the Source of Work from the pick list.
- Enter the Requestor name.
- You can add or edit the Requestor Phone number, if needed.
- Check the Is Compliance Related box if the work will be performed to fulfill a compliance requirement. *Note: The Is Compliance Related box is only visible for users with the Can See Compliance Checkbox permission in User Roles Settings.
- Click the Notify Others? link and enter the emails of any people that need to receive notifications regarding the request. *Note: People added for notification are updated automatically when the request is made, accepted as a work order, edited, and completed.
- Click the Attach a File? link to attach a document, photo, or other file to this request.
- Click the Unsubscribe from email updates link to choose not to receive update notifications for this request.
- Check the Permission to Enter? box to allow a technician to enter your residence to address the issue if you are unavailable. You can leave specific instructions in the field provided below the box.
- Enter any Other Special Resident Notes if needed.
- Click I'm Done! to save the request. Or if you have another request to enter for same department, click Add Another to save this request and bring up a new request form.
How to Submit a Room Booking Request
- From your Home tab, click on Room Booking. *Note: This option may not appear depending on how your account was configured.
-
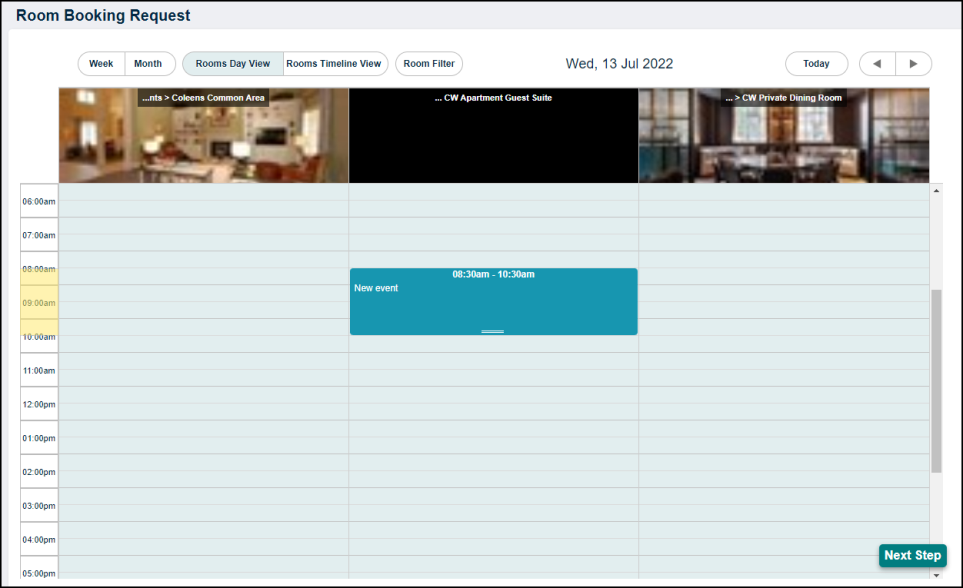
You will be directed to a Calendar showing all bookable rooms for today.
- Click the arrows in the top right corner to navigate to a different day or switch to the Month or Week view.
- You can also filter the calendar for just the rooms you want to see. If you apply a Room Filter, TheWorxHub will remember that the next time you book a room.
- Click on the desired start time under the room you would like to book and drag down to the desired end time.
- Click Next Step.
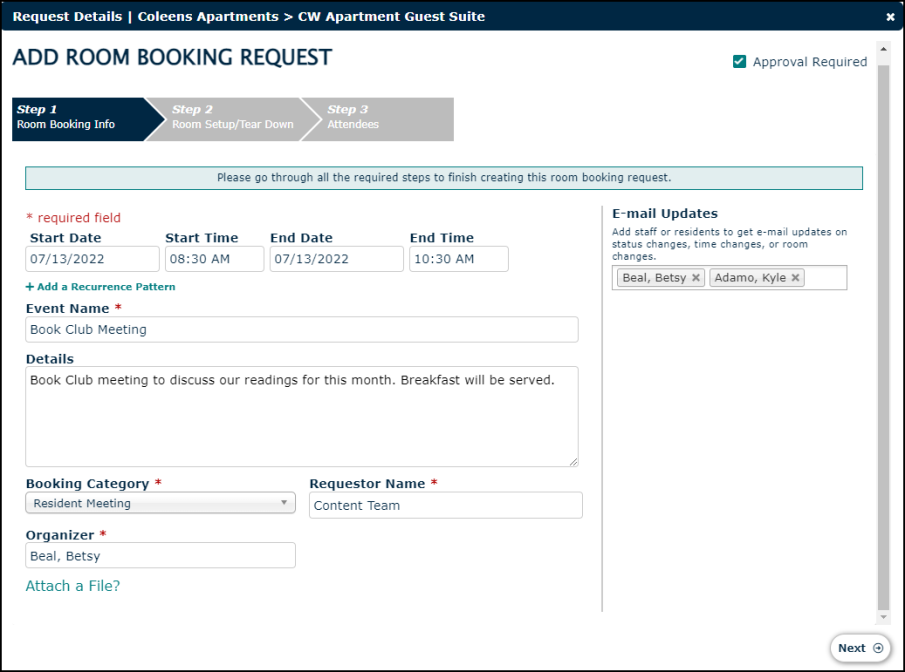
- On the next page, enter the name of the event in the Event Name field.
- Enter the event details in the Details box.
- Select the appropriate Booking Category from the drop down.
- Enter the Requestor Name.
- Enter the name of the Organizer. The organizer is the primary person to receive email notifications for this event. An organizer can be a staff member or a resident.
- Depending on the Booking Category you selected, you may have an additional field to select the Activity Dimensions of Wellness. You can select as many as apply to your event.
- Click the Attach a File? link to attach a document, photo, or other file to this request.
- Select the names of other staff or residents in the Email Updates field to send them updates on this request.
- If this event spans over multiple days, you can check the Multi-Day Booking box. This will allow you to select a different end date and will extend you event from the start time on the first date until the end time on the last date.
- Click the Save Room Booking button to submit your request.
- If the Room Setup/Tear Down tab is available, you will now be able to enter additional information for your event, such as room setup and tear down tasks, equipment reservations, and catering requests.
How to Submit a Transportation Request
Watch the Video Tutorial:

- From your Home tab, click on Transportation.
- Type the names of the Passengers that will be attending the trip. You can add as many passengers as needed.
- If the person attending the trip is not listed as a Resident, click Add ad hoc passenger to add them to the trip.
- Enter the Trip Date.
- Check either the Appointment Time box or the Departure Time box for this trip.
- Appointment Time indicates that you have a specific appoint time at one or more of the destinations on the trip. If this box is checked you will enter the appointment time in the fields that appear in the Where & When section of the form.
- Departure Time indicates that you just need to specify the time of departure.
Where & When
- Enter the starting address in the From field and the destination address in the To field.
- Click the favorites link to select from a list of frequently visited destinations.
- Click the Add Another Stop link to add another destination and, if needed, another appointment time.
- The Return To Start checkbox indicates that you will return to the start address at the end of the trip.
Trip Name & Other Details
- Enter a Trip Name and the name of the Requestor.
- If needed, enter any Special Notes or instructions about this trip.
- Select the Trip Category from the drop down list.
- Check the Sharable box to indicate that you or the passengers on this trip can share the vehicle with other residents.
- Click Save.

